
We would like to think about the Excel files from other departments at this time. In this case, it is needed the complex way to load them because the Excel files can be freely processed and they are made so that people can easily understand them.
For example, the following file is often passed on from other departments.
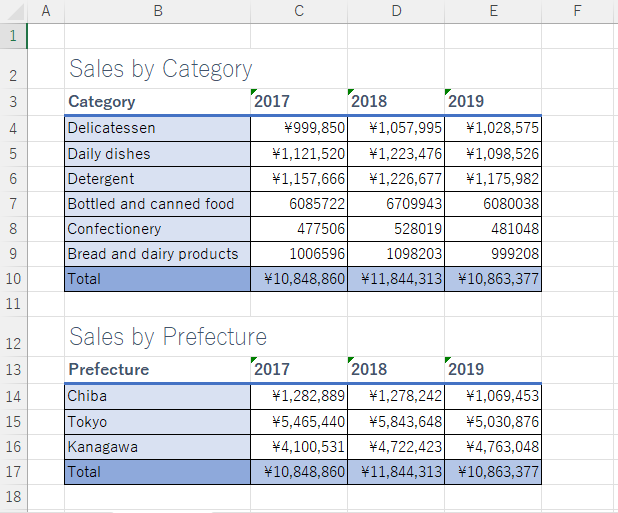
In this case, we need the complex workflow as bellow.

If such this data is stored in a database, it could easily be load into Alteryx by only two Data Input tools. However people often makes such Excel file to understand data easily. But if you can negotiate with the department to use the “Named Range”, you don’t need to use that complex and unefficient workflow.
Use the named range of Excel
Do you know the named range of Excel? This feature is able to named the range. After you define the name to the range, they can be loaded from Alteryx or other tools as if they are sheets.
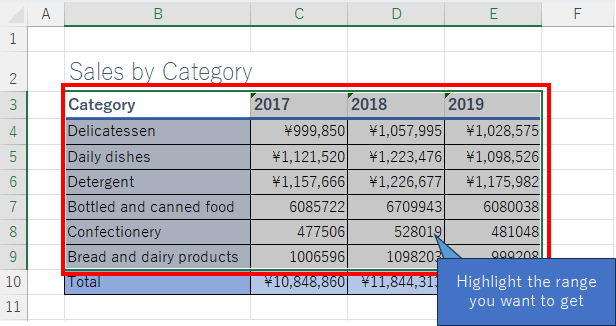
To define a named range, you can set it up on the Formulas tab in Excel. First you have to select the range which you want to set.
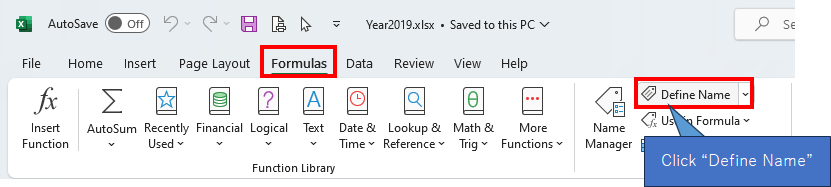
Second, click the “Define Name” on Formulas tab.
Third, fill the name which you want. At this time, the “Refers to” is automatically set because you have already highlighted.
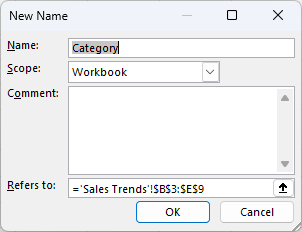
After you click “OK” button, it’s over.
After that, when you load that file, you can select the named ranges at “Select a named range” dropdown box. If you select “Category”,
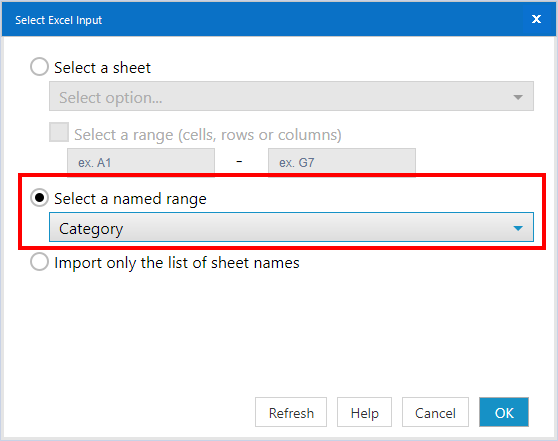
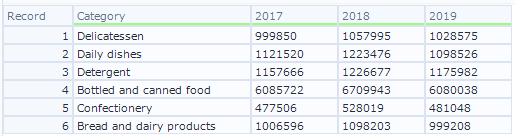
The result is as follows.
This sample file contains two named ranges, so you have to use two Data Input tools to load two named ranges. But is is more easy to load the range than the first way without named range.
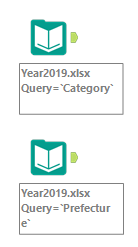
But we can not get the named range list like the sheets name way. So if you want to load the named ranges by using Batch macro at once, you have to know the named range list in advance.
If you have already known the named range list, the full path for Excel file and named range are expressed like sheet names. For example, this is the sample “Category” which I explained as above,
C:\Year2019.xlsx|||`Category`Sample workflow download
Contents of the next blog
I will try to write the data to the formatted Excel file.

コメント