
This post is continued from last post. In this post, I would handle the Excel file output instead of the CSV files.
For example, you want to sent the divided Excel report to each person. The detail is as follows.
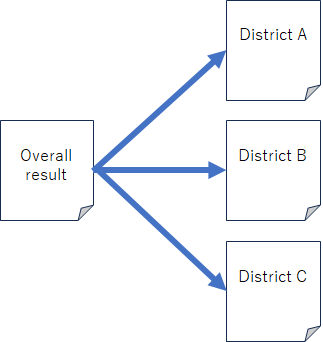
In this case, as I wrote at previous post, the simplest way is using the Filter tools and the Output Data tools for each district as follows.

If the salesperson increases, you have to add more and more Filter tools and Output Data tools…It’s very troublesome. Is it bearable for 2-3 people?
One tool solution?!
You can solve using one tool for CSV files reading, but when you want to save the data into the multiple Excel files, you also need to use Formula tool because of the Book and Sheet concept!
Before explaining the correct way, I would try to do the same way as saving CSV files.
Firstly, I would set the same option as saving CSV files.
- Set the Output Options as “Overwrite Sheet or Range”
- Check the “Take File/Table Name From Field” option
- Select the field “Salesperson” to “Field Containing File Name or Part if File Name”
- Check the “Keep Field in Output”
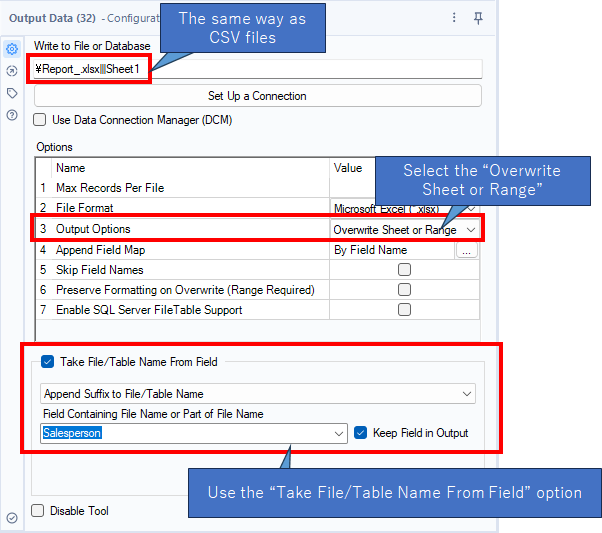
When you set these option, the result is as follows.

I think something is different from what we want to do.
I would see the detail. The output file is only “Report_.xlsx” and there are separated sheets in that file as follows.
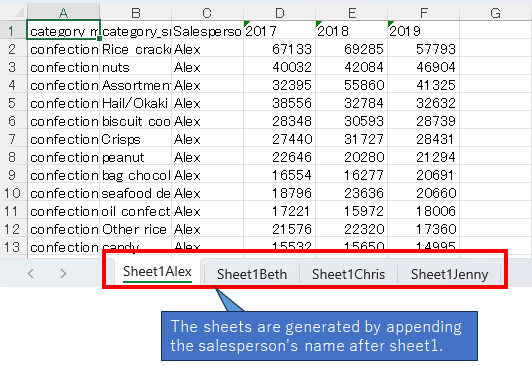
When you want to send this file to each sales person, you have to delete the unnecessaly sheets from that file before sending it to each person. It is waste of the time.
But, what we want are…
Use the “Change Entire File Path” option
The correct way is that making the correct file paths yourself and setting the “Change Entire File Path” option at the Output Data tool.
First, use the Formula tool to make the correct file path.
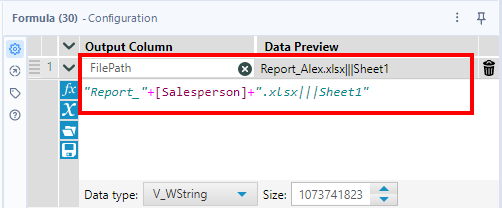
The expression is as follows.
"Report_"+[Salesperson]+".xlsx|||Sheet1"You can change the sheet name or file name however you like. But there is a rules for it that the file name is needed three “|”(pipe) and sheet name after the file name.
And at this setting, I set the file path which is located under the folder where the workflow is because I want to save the file there. If you want to save them under the another folder, for example, you want to save them under “c:\temp”, you set the file path as “c:\temp\Report_” as well.
Second, set the Output Data tool as follows.
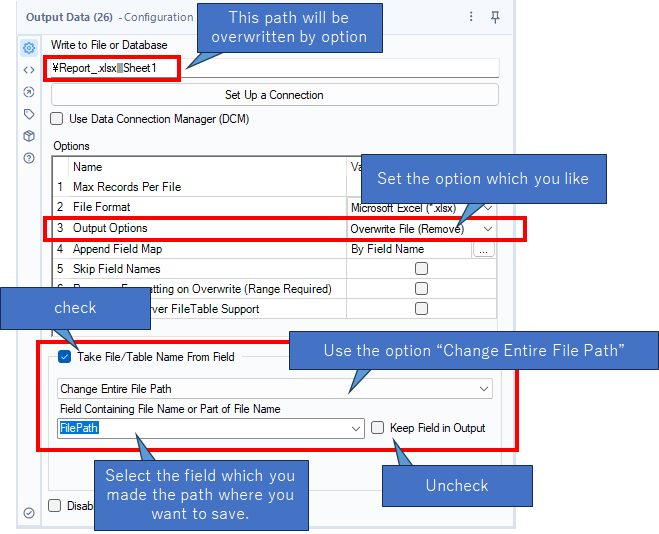
The important point is the detail setting of “Tak File/Table Name From Field” option. You have to select the option “Change Entire File Path”. “Field Containing File Name or Part of File Name” should be set the field “FilePath” where you want to save. And uncheck the “Keep Field in Output” option because the file path should not be leave in the output file.
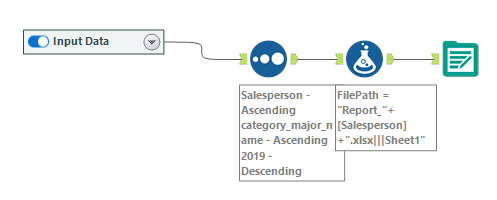
The final workflow is as follows.
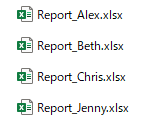
After the running, that workflow outputs as follow.
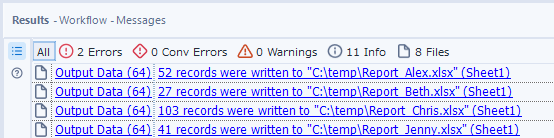
This is what we want. The data is saved at the separated Excel book.
Sample Workflow Download
Contents of the next blog
I’ll take a break from file input/output for a moment, and next time I’ll look at tips for Crosstab tool.

コメント