Sorry for the long title. This post means strictly that “How to put the some Spatial Objects have different positions on a map of the same area using the Report Map tool”.
Specific Requirements
For example, the whole map which has all spatial objects is as follows.
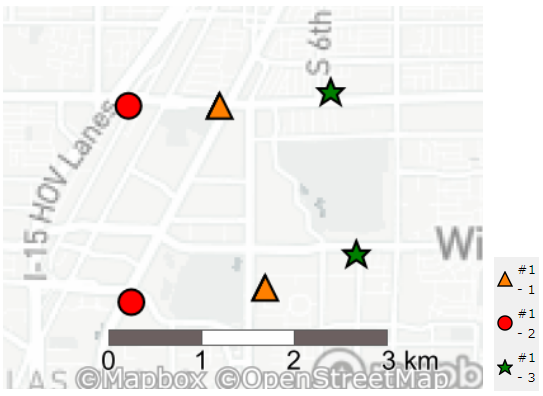
Here, you want to make some different maps for each group which are triangle, circle and star, but you want to put them the same background map’s position. But normally, the Report Map tool using group function put them on the different background map position.
In other hands, specifically, you would like to create each of the following maps.
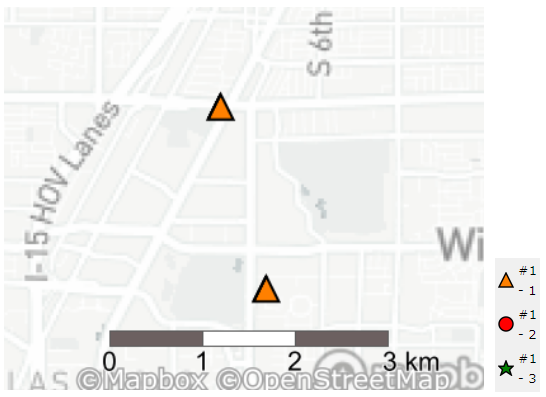
Group : 1 – Triangle
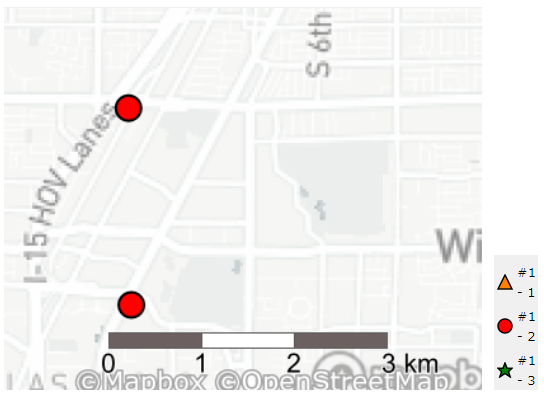
Gourp : 2 – Circle
Group : 3 – Star
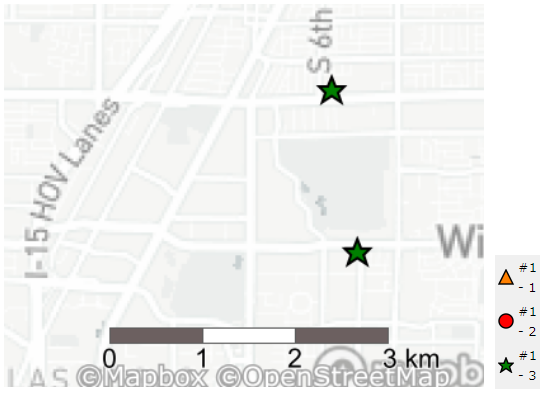
All maps locate on the same background map’s position. I would like to explain how to do it on this post.
Show the spatial objects at the same background map
First、I would like to use the workflow of WeeklyTips#18.
You can use the Grouping Field option in this case.

So, I set that option to “Label” field as above. Let’s see the output.
Group : 1 – Triangle

Gourp : 2 – Circle
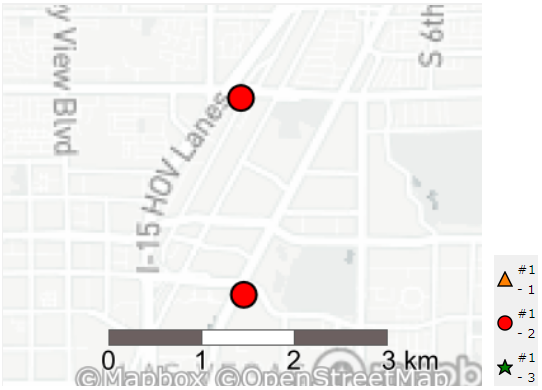
Group : 3 – Star
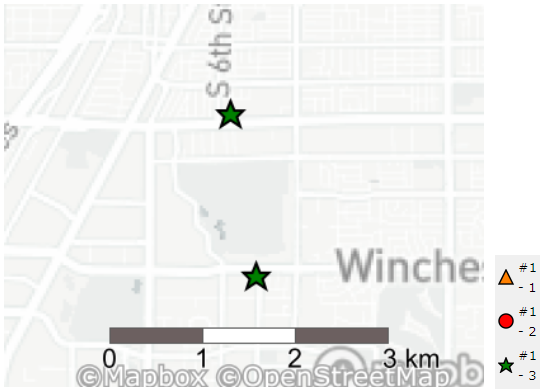
The background map’s location of every outputs were moved. The Report Map tool seems to locate the center of the spatial objects to the center of the background map. But if you want those pattern, it is ok, but on this post, these are not what we want.
Fix the background map
So, I would like to fix the background map position. The range for displaying the whole spatial objects will be the convex hull of the spatial objects you want to display. In other words, you need to create a convex hull using the Summarize tool as shown below.

Let’s see the output at the Browse tool.

It makes the polygon which contains all spatial objects. And then, put it into the Report Map tool as follows.
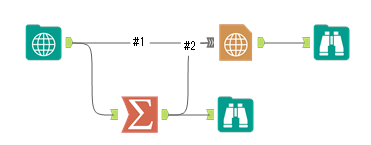
Let’s set the Report Map tool. You need to hide that polygon in order to this task. So first, add the polygon as Polygons Layer.

After that, select the layer which you added and check the “Disable” checkbox.

And also, you need to check the “Zoom to Layer” checkbox. It will be chekced by default, but if not, you need to check that checkbox. After that, the background map location will be fixed and that convex hull polygon will not be shown.
All tasks are over. You should get what you want.
Summary
I explained you how to fix the position of the backgroundmap when using the grouping field option. If you need that the spatial object position is located in centered, this technique is not necessary.
Sample Workflow Download
Contents of the next blog
The next contents will be about Database connection.

コメント